Configuration
The Configuration Page shows some generally applicable settings that affect the overall Lighthouse behaviour.
Blackout Periods & Recurring Rules
Blackout periods let you mark specific dates or date ranges as non-working days — for example, public holidays, company off-days, or planned shutdowns. Recurring rules cover the days that come back on a schedule — weekends, a fixed no-meeting Friday, or a sprint-review day every two weeks — without you having to add each occurrence by hand.

Both one-off periods and recurring rules feed the same forecasting and metrics behaviour described below — Lighthouse simply expands each recurring rule into the concrete days it covers and treats them exactly like a manually-entered blackout day.
Lighthouse uses this information in two ways:
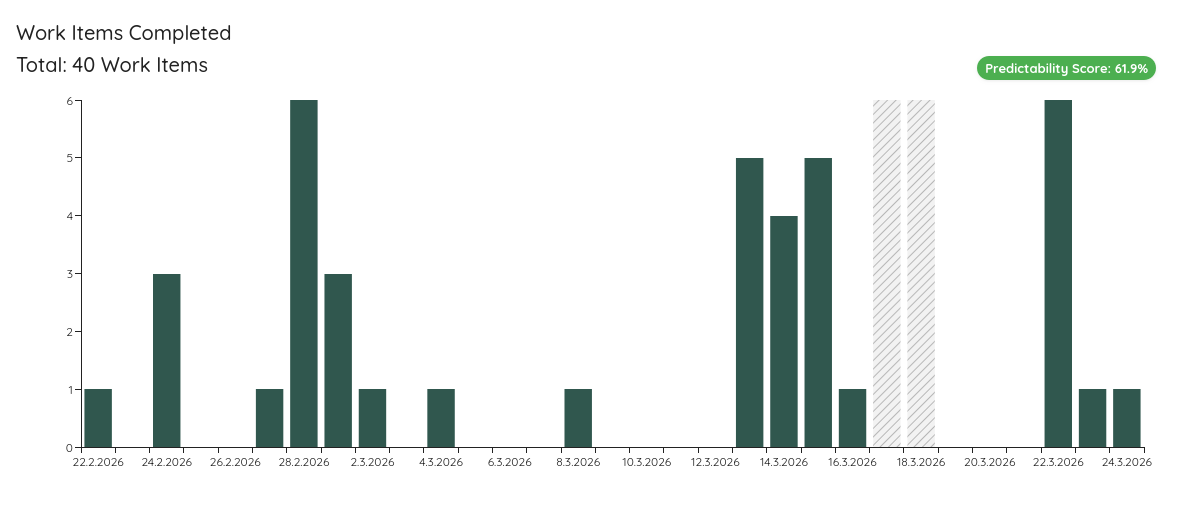
- Forecasting: When running Monte Carlo Simulations, days that fall within a blackout period are skipped entirely. The simulation treats those days as if your team did no work, which means they do not count against the forecast duration and are not sampled for throughput. This keeps your forecasts accurate even when the future contains known non-working periods.
- Metrics charts: Blackout days are visually highlighted with a hatched overlay in run charts, Process Behaviour Charts, and the Cycle Time Scatterplot, so you can immediately see which dips or gaps in your data were expected rather than a sign of a problem.
Adding and Managing Blackout Periods
- Navigate to System Settings → Configuration.
- Locate the Blackout Periods section.
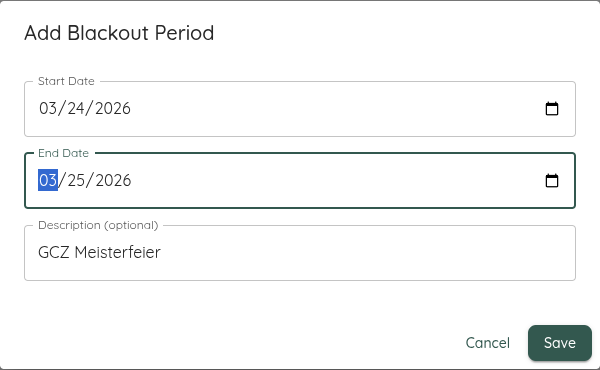
- Click Add Blackout Period and provide:
- Start date — the first day of the blackout.
- End date — the last day of the blackout (can be the same as the start date for a single day).
- Description — a short label such as “Christmas” or “Bank Holiday”.
- Click Save to confirm. The period will take effect immediately for new forecasts and metric views.
You can add multiple blackout periods, edit existing ones, or delete them at any time. Changes apply globally across all teams and portfolios.
Blackout periods are a global configuration and apply to every team and portfolio in your Lighthouse instance.
Recurring Blackout Rules (Premium)
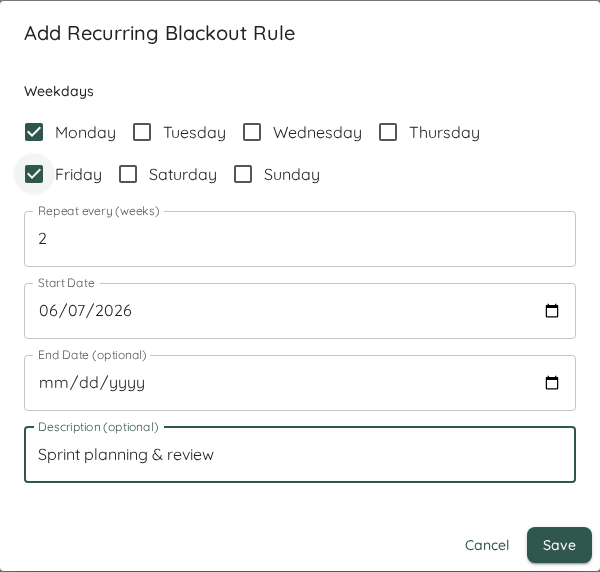
When a non-working day repeats on a schedule, add a Recurring Rule instead of entering each date individually. Click Add Recurring Rule and define:
- Weekdays — one or more days of the week the rule applies to (for example Saturday and Sunday for weekends, or just Friday).
- Repeat every (weeks) — the cadence. Use
1for every week,2for every other week, and so on. The interval is counted from the start date. - Start date — the first date from which the rule is active.
- End date (optional) — leave it empty for an open-ended rule that keeps applying indefinitely, or set a date to stop the recurrence.
- Description — a short label such as “Weekends” or “Sprint Review”.
Recurring rules and one-off periods are listed together in the same section, each with its own schedule summary. Edit or delete them at any time; the change takes effect immediately for new forecasts and metric views.
Use a recurring rule for weekends or any regularly repeating closure, and reserve one-off periods for exceptions such as a single public holiday. This keeps the list short and your intent obvious.
Managing blackout periods and recurring rules requires a Premium license. Existing entries remain active for forecasting and metrics even if a license lapses — only the ability to add, edit, or delete them is gated.
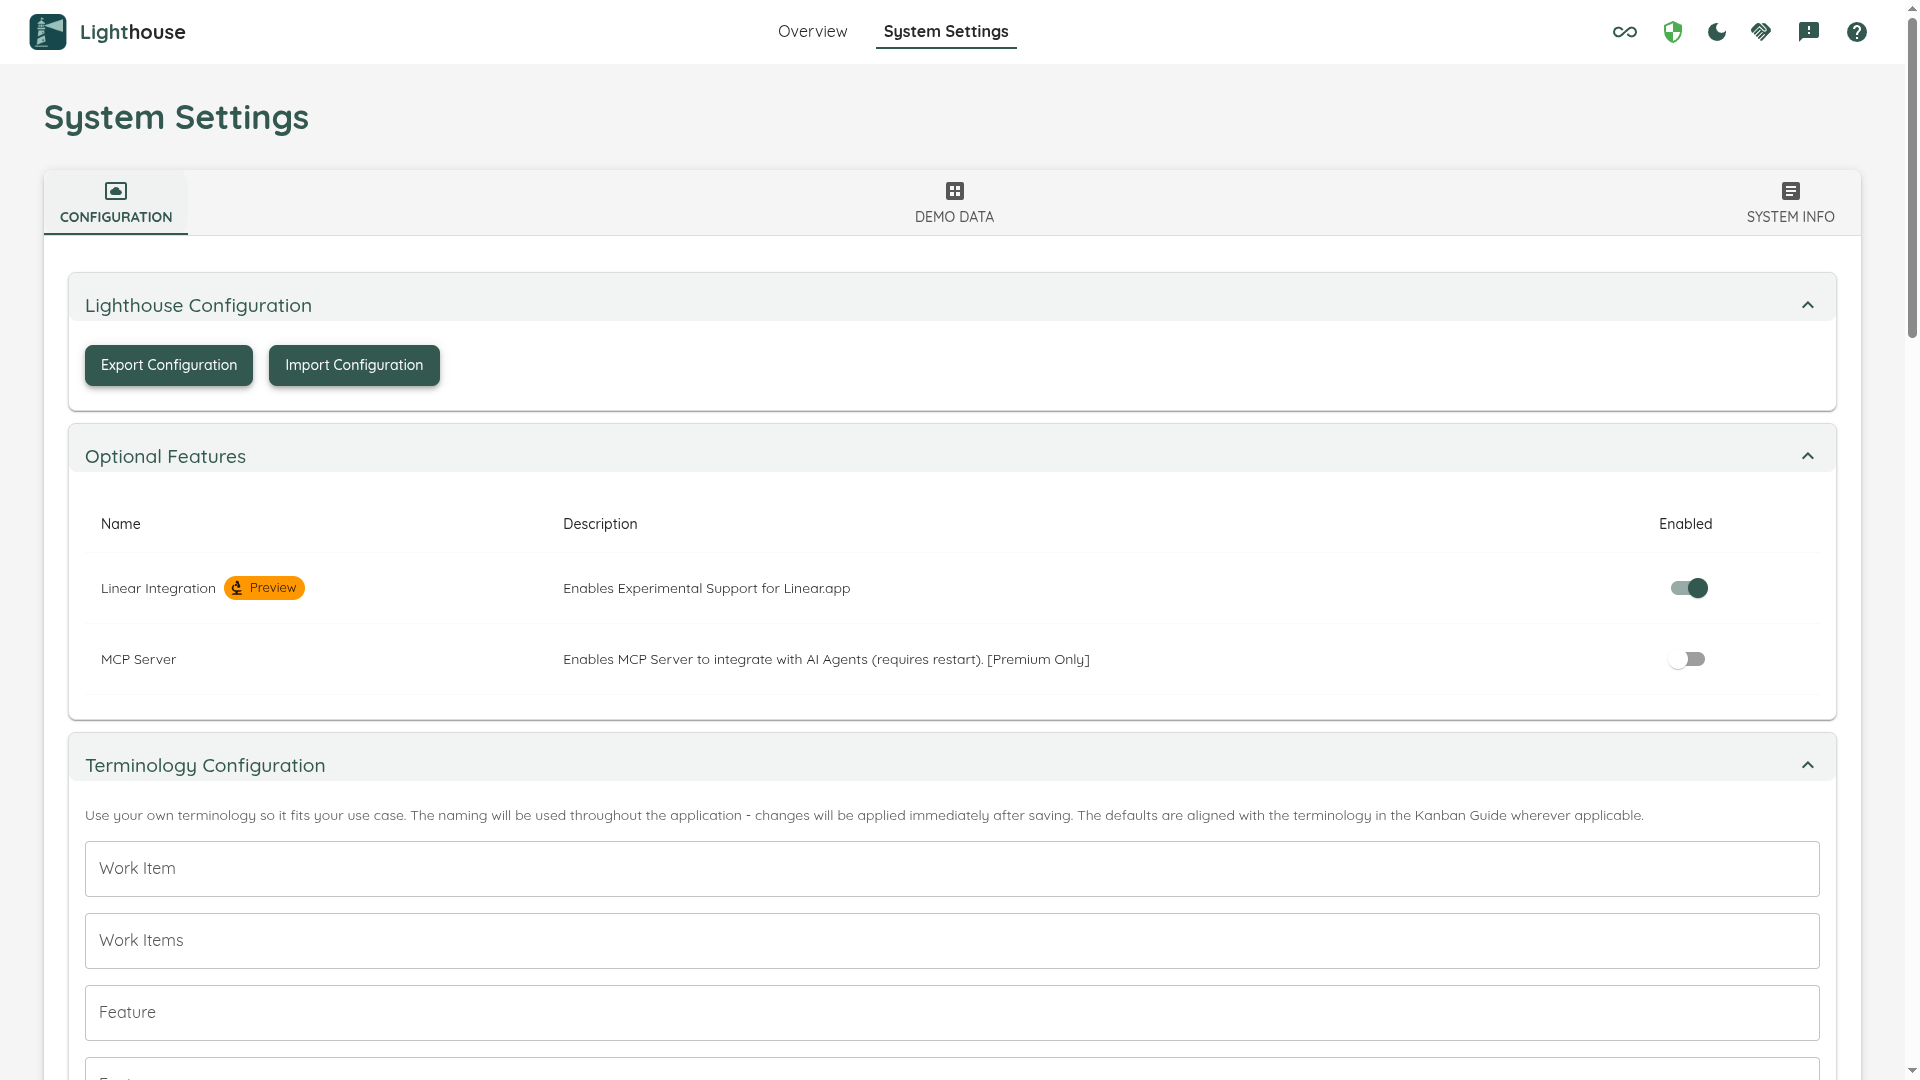
Optional Features
Some features might not make sense to be enabled in all situations. And occasionally some new features will be deployed with the latest version of Lighthouse that we deem not ready for general use. In such a case you would find a toggle in the Optional Features setting which you can selectively enable or disable.

Eventually, the Features in preview will be integrated into the regular functionality, and the preview flag will be removed. In rare cases, a preview feature might get removed.
While preview features should be relatively stable, it can be that they will not work perfectly yet. If you enable them and encounter issues, please let us know about it. We’re looking forward to your feedback!
If you are enabling Lighthouse features for AI clients, MCP, or automation workflows, continue with AI and Automation. If the target instance requires authentication, create credentials in API Keys.
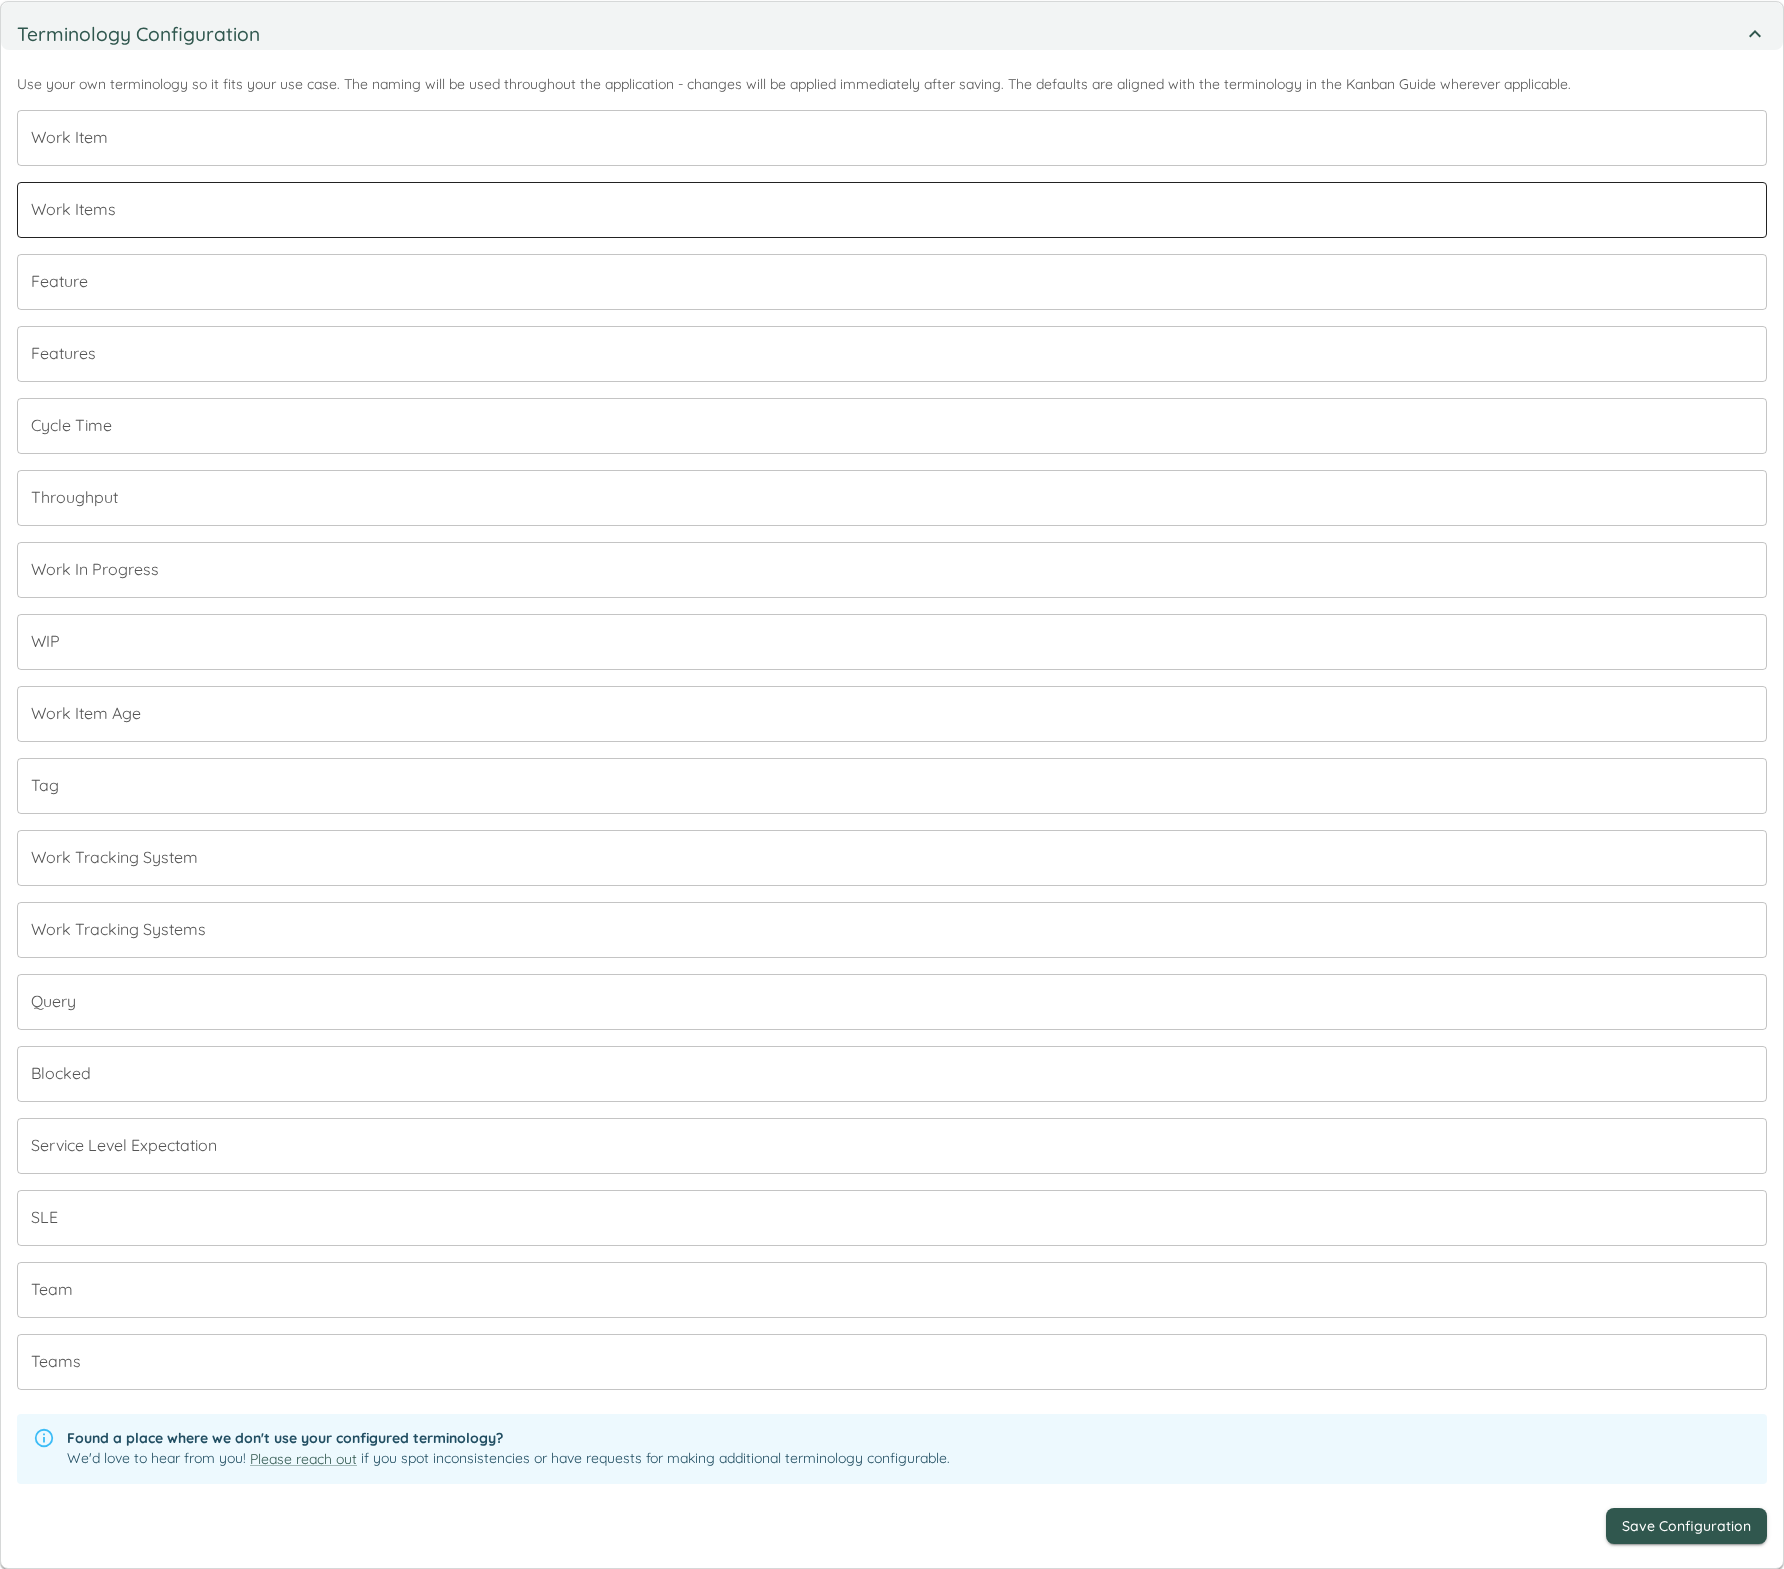
Terminology Configuration
Lighthouse allows you to customize the terminology used throughout the application to better align with your organization’s language and workflow conventions. This feature helps eliminate confusion by ensuring consistent terminology that matches how your team and organization refers to work items and concepts.
Configurable Terms
The terminology configuration allows you to customize the following terms:
| Term Category | Default Value | Description | Example Alternatives |
|---|---|---|---|
| Work Item | Work Item | Individual units of work tracked in your system | Story, Task, Issue, Ticket, Item |
| Work Items | Work Items | Plural form of work item | Stories, Tasks, Issues, Tickets, Items |
| Feature | Feature | Larger units of work that contain multiple work items | Epic, Initiative, Theme, Component |
| Features | Features | Plural form of feature | Epics, Initiatives, Themes, Components |
| Cycle Time | Cycle Time | Time from when work starts until completion | Lead Time, Flow Time, Delivery Time |
| Throughput | Throughput | Number of items completed in a given time period | Velocity, Delivery Rate, Completion Rate |
| Work in Progress | Work in Progress | Items currently being worked on | WIP, In Progress, Active Work |
| WIP | WIP | Abbreviated form of Work in Progress | IP, Active, Current |
| Work Item Age | Work Item Age | How long an item has been in progress | Item Age, Story Age, Task Age |
| Tag | Tag | Labels or categories applied to work items | Label, Category, Type, Keyword |
| Work Tracking System | Work Tracking System | The external system that stores your work items | Issue Tracker, Project Management Tool, ALM Tool |
| Work Tracking Systems | Work Tracking Systems | Plural form of work tracking system | Issue Trackers, Project Management Tools, ALM Tools |
| Query | Query | Search criteria used to find work items | Search, Filter, JQL, WIQL |
| Blocked | Blocked | Items that cannot progress due to impediments | Impediment, Stuck, On Hold, Waiting |
| Service Level Expectation | Service Level Expectation | Expected time for work completion | SLE, Target Time, Goal, Commitment |
| SLE | SLE | Abbreviated form of Service Level Expectation | Target, Goal, Expectation |
| Team | Team | Groups of people working together | Squad, Crew, Group, Department |
| Teams | Teams | Plural form of team | Squads, Crews, Groups, Departments |
How to Configure
- Navigate to System Settings → Configuration
- Locate the Terminology Configuration section
- For each term you want to customize:
- View the current default value and description
- Enter your preferred terminology in the input field
- Leave blank to use the default value
- Click Save to apply your changes
Benefits of Customization
- Consistency: Eliminates confusion from mixed terminology throughout the application
- Familiarity: Use terms that your team already knows and understands
- Alignment: Match existing organizational vocabulary and processes
- Adoption: Reduce the learning curve for new users by using familiar language
- Communication: Improve clarity when discussing metrics and workflows with stakeholders
Best Practices
- Team Alignment: Involve your team in deciding on terminology to ensure everyone understands and agrees with the chosen terms
- Organizational Standards: Align with existing terminology used in your organization’s other tools and processes
- Documentation: Update any team documentation or training materials to reflect the customized terminology
- Consistency: Use the same terms consistently across all teams and portfolios in your Lighthouse instance
Changes to terminology are applied immediately throughout the entire application interface. All existing data and configurations remain unchanged - only the display labels are updated.
Periodic Refresh Settings
One of the main advantages of Lighthouse is the fact that it’s not only offering to run the forecasts on demand, but also continuously. To fine-tune this, you can adjust the several settings:
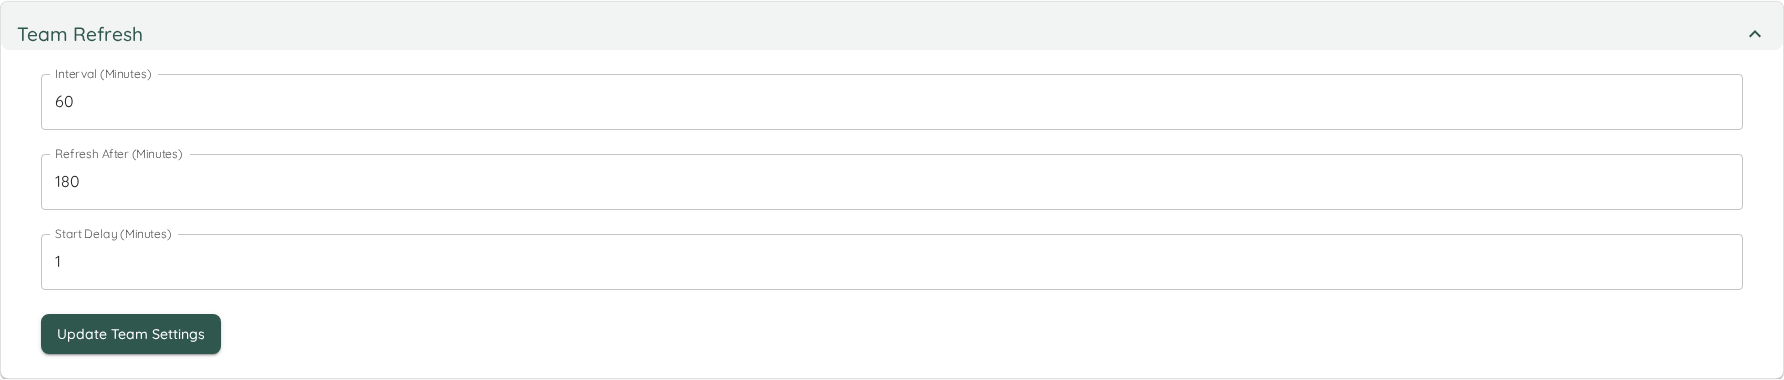
Refresh Types
There are two types of refreshes:
- Team
- Feature
The Team refresh fetches all items related to your team, and is equivalent to clicking the update icon on the Team page, while the Feature refresh updates portfolio data and is equivalent to using the refresh icon on the Portfolio page.
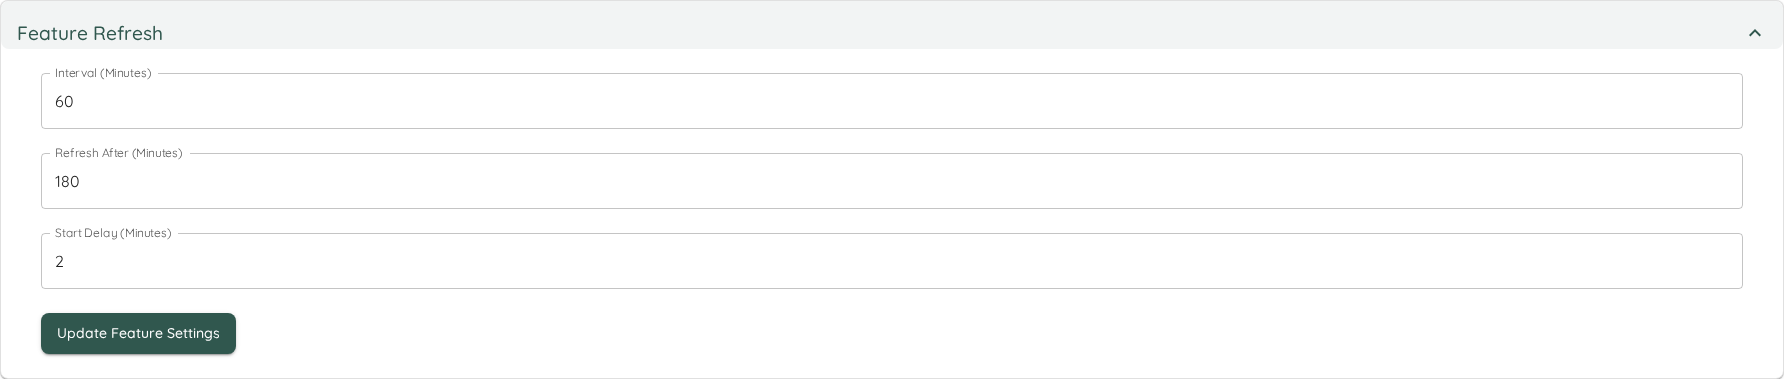
Setting Details
Each refresh type contains three different settings. All settings are specified in minutes. After adjusting the setting, the Update Settings button must be pressed for the changes to become effective.
| Name | Description |
|---|---|
| Interval (Minutes) | The time between checks if the data should be updated. This means, after x minutes Lighthouse will check if the last update was older than what was defined in Refresh After. |
| Refresh After (Minutes) | The time after which a refresh will be triggered if the last one was more than this time ago. |
| Start Delay (Minutes) | The delay before the background task is started when the application starts. This can be useful as you may not want to trigger updates just after startup. |